Installing AirNav Radar FlightStick 1090 on Windows 11 (Complete Working Guide)
AirNav advertises Windows support for the Radar FlightStick 1090, but provides no proper documentation, broken links, and no real step-by-step guide. This post documents a fully working setup on Windows 11 using Zadig + dump1090 + RadarBox24 Data Sharer.
Although AirNav claims Windows support, their website provides no instructions for setting up or running the FlightStick on Windows.
🧰 Hardware
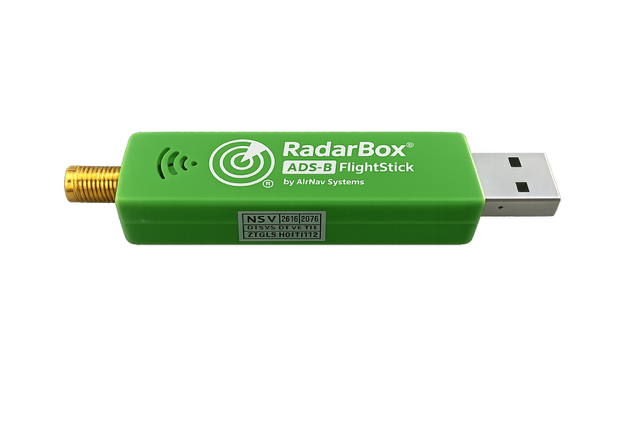
- Receiver: AirNav Radar FlightStick 1090
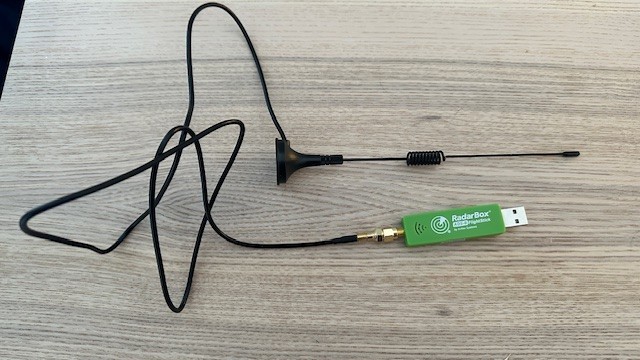
- Antenna: External ADS-B 1090 MHz antenna (MCX plug)
- Example: 1090 MHz magnet-mount ADS-B antenna with MCX → SMA adapter (Amazon.ca)
- PC: Windows 11
- Tip: Use a short USB extension cable to reduce noise from your PC’s USB ports
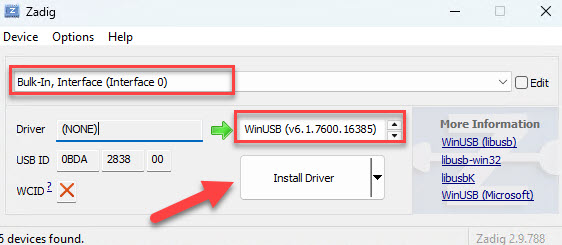
🔌 Install Windows Driver (Zadig – REQUIRED)
Windows default drivers do not work for ADS-B decoding. You must install WinUSB.
Steps
- Download Zadig
👉 https://zadig.akeo.ie/ - Run Zadig as Administrator
- In Zadig:
- Click Options → List All Devices
- Select device:
ADS-B_1090or Bulk-Inn Interface (Interfcae 0) - Set driver:
WinUSB - Click Install Driver
Important: Interfaces
RadarBox FlightStick exposes two interfaces:
| Interface | Purpose |
|---|---|
| Interface 0 | ADS-B receiver (THIS ONE NEEDS WinUSB) |
| Interface 1 | Control / auxiliary (DO NOT INSTALL DRIVER) |
Only Interface 0 talks to dump1090.
🛰️ ADS-B Decoder (dump1090 for Windows – Mode-S Decoder)
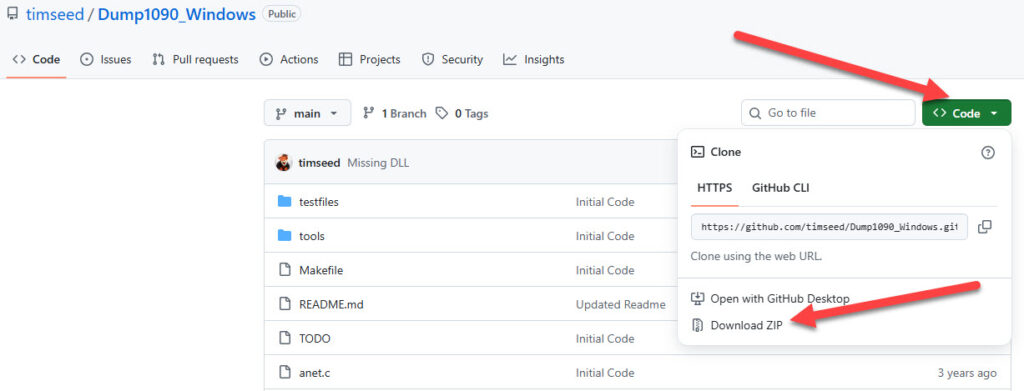
Download a Windows build of dump1090:
- Windows build:
👉 https://github.com/timseed/Dump1090_Windows/tree/main
Navigate to Code nad Donwload ZIP File
Extract to:
C:\ADS-B\Dump1090
Folder should contain:
dump1090.exe
rtlsdr.dll
libusb-1.0.dll
▶️ Start dump1090 (Working Command)
Your Windows build supports SBS, not Beast format.
Open comand prompt and run.
cd C:\ADS-B\Dump1090
dump1090.exe --net --interactive --net-sbs-port 30003 --net-http-port 8080 --gain 40
Tune Gain for Best Performance
Try these and keep the one with the highest messages/sec:
--gain 38
--gain 40
--gain 42
✅ What dump1090 Gives You
- Live aircraft decoding in console
- Local web UI:
👉 http://127.0.0.1:8080 - SBS feed on port 30003 (for RadarBox24, Virtual Radar Server, etc.)
🔗 Hook AirNav RadarBox to Your Windows Feeder
Once dump1090 is running, connect it to AirNav RadarBox.
1️⃣ Create AirNav Account
👉 https://www.airnavradar.com/
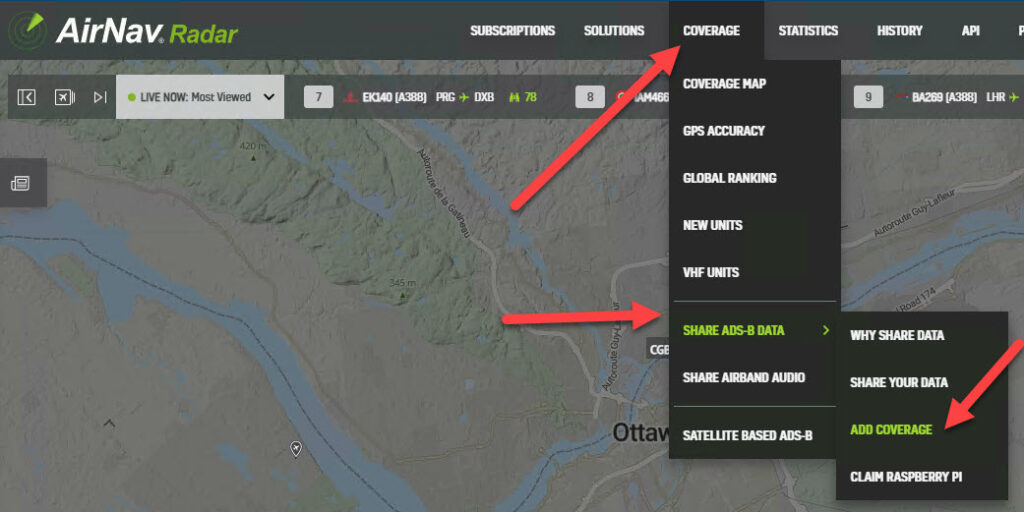
2️⃣ Navigate to Data Sharing
After login:
Coverage → Share ADS-B Data
3️⃣ Step 1 – Receiver
Select:
✅ I have an ADS-B/Mode-S receiver
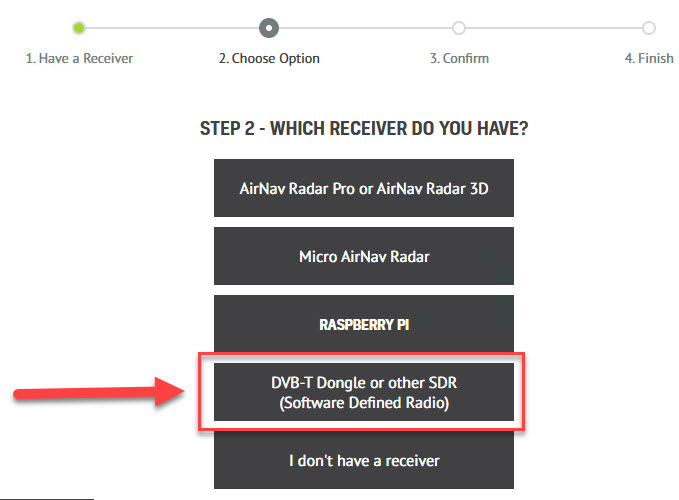
4️⃣ Step 2 – Receiver Type
Select:
✅ DVB-T Dongle or other SDR (Software Defined Radio)
(The AirNav FlightStick 1090 is an RTL-SDR device.)
5️⃣ Step 3 – Download Feeder Software
Download and install:
RB24DataShareSetup.exe
Launch RadarBox24 Data Sharer after install.
⚙️ Configure RadarBox24 Data Sharer
Log in to RadarBox24 Data Sharer using your AirNav account.
If auto-detect doesn’t work, configure manually:
| Setting | Value |
|---|---|
| Input Type | SBS |
| Host | 127.0.0.1 |
| Port | 30003 |
Enable:
☑️ Start application with Windows
Click:
🔗 Connect
🗺️ Verification (How You Confirm It Works)
Your setup is working when:
- dump1090 console shows aircraft hex codes

- http://127.0.0.1:8080 shows live aircraft

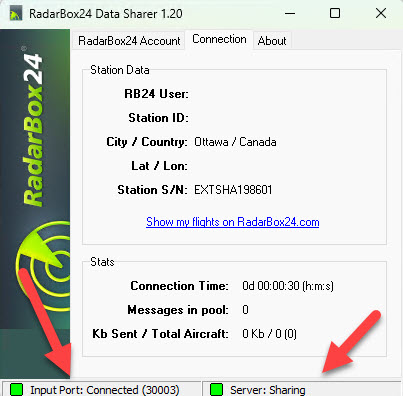
- RadarBox24 Data Sharer shows:
- Input Port: Connected (30003)
- Server: Sharing
- Your station page on AirNav RadarBox starts populating
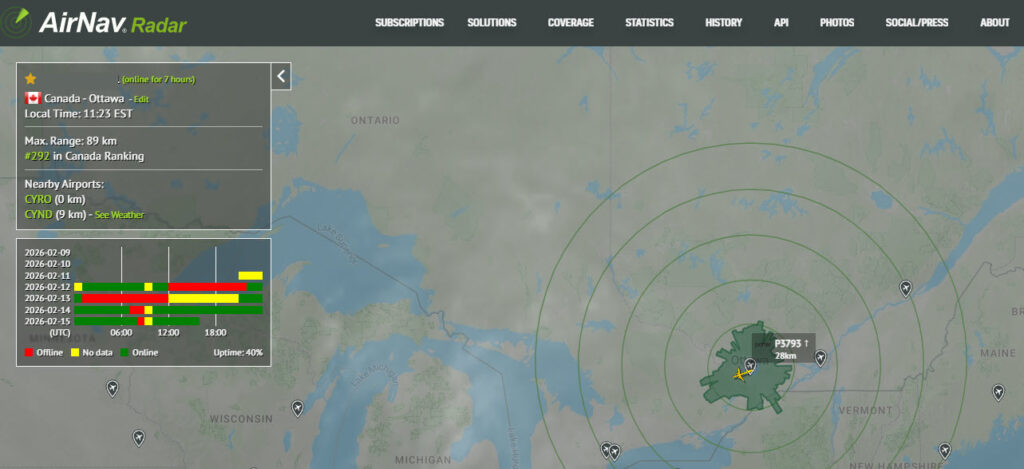
Check statistics on AirNav Radar
Log in to airnavradar.com, then navigate to:
Account → Stations
Select your station, and you’ll see all your live statistics and sharing status displayed on the station page (aircraft count, messages, uptime, ranking, coverage, etc.).
📡 Automatic Business Upgrade When Your AirNav Feeder Goes Live
Once you finish setting up the AirNav FlightStick 1090 on Windows 11 and your feeder goes live, AirNav automatically upgrades your account to a Business subscription. No manual subscription or payment setup is required — the upgrade is applied based on your active public feeder.
🧠 One-Line Summary
AirNav FlightStick 1090 → WinUSB (Zadig) → dump1090 (SBS on 30003) → RadarBox24 Data Sharer → airnavradar.com = Live public feeder on Windows 11